Working with Zigbee 🐝
In order to use a Zigbee device you need to configure a network with a so called coordinator device which is responsible for creating the network and routing traffic.
For this purpose we'll use a USB dongle CC2531, designed by Texas Instrument.
However before start using it, the dongle needs to be flashed with a new firmware (a software that allows it to act as a network coordinator).
In this tutorial we will show you how to correctly configure the USB dongle for getting it ready for Instathings.
It will take just 5 minutes, let's start!
Flash the firmware to the USB dongle
Hardware requirements
This tutorial is for MacOS systems and you need the following devices:
Software requirements
First of all you need to install Homebrew on you Mac. Open the terminal and execute the following commands line by line:
# install brew
/usr/bin/ruby -e "$(curl -fsSL https://raw.githubusercontent.com/Homebrew/install/master/install)"

# install dependecies
brew install autoconf automake libusb boost pkgconfig libtool

# clone cc-tool
git clone https://github.com/dashesy/cc-tool.git
cd cc-tool
./bootstrap
./configure
make
Download the firmware
Download the firmware from the following link. This software will be flashed in the dongle.
Connect the dongle
Now you need to connect the dongle to the CC Debugger and then connect the dongle to your pc. The cables connection is shown in the following picture.
Generally the status led on the debugger should be green, if not turn off and on the debbuger.

Flash the firmware
Now, from your command line, execute the following command:
sudo ./cc-tool -e -w CC2531ZNP-Prod.hex`
Check the connection
Now let's move from our Mac to the device that will use with our Instathings system. For this tutorial we're using a Raspberry Pi 4.
Connect your USB dongle to your device let's execute the following script to check if it is correctly detected.
sudo nano cc2531.sh
Copy the following script and then save it (to save type Ctrl+X, Y, Enter)
#!/bin/bash
for sysdevpath in $(find /sys/bus/usb/devices/usb*/ -name dev); do
    (
        syspath="${sysdevpath%/dev}"
        devname="$(udevadm info -q name -p $syspath)"
        [[ "$devname" == "bus/"* ]]
        eval "$(udevadm info -q property --export -p $syspath)"
        [[ -z "$ID_SERIAL" ]]
        echo "/dev/$devname - $ID_SERIAL"
    )
done
Now give it the permission and execute it
sudo chmod +x cc2531.sh
./cc2531.sh
If everything worked fine, you should see something like this:
/dev/bus/usb/001/001 - Linux_4.19.75-v7l+_xhci-hcd_xHCI_Host_Controller_0000:01:00.0
/dev/ttyACM0 - Texas_Instruments_TI_CC2531_USB_CDC___0X00124B0018E199DF
/dev/bus/usb/001/004 - Texas_Instruments_TI_CC2531_USB_CDC___0X00124B0018E199DF
/dev/bus/usb/001/002 - 2109_USB2.0_Hub
/dev/bus/usb/002/001 - Linux_4.19.75-v7l+_xhci-hcd_xHCI_Host_Controller_0000:01:00.0
/dev/bus/usb/003/001 - Linux_4.19.75-v7l+_dwc_otg_hcd_DWC_OTG_Controller_fe980000.usb
As you can see our dongle is correctly detected on /dev/ttyACM0 and we can now start using our Zigbee network!
Install protocol
Before following instructions in this section, you need to go back to the previous tutorial and configure your Gateway to get the connection with Instathings. If you have already done it, you can go on with the installation of the Zigbee software into your Gateway.
Just a few clicks and you will be ready!
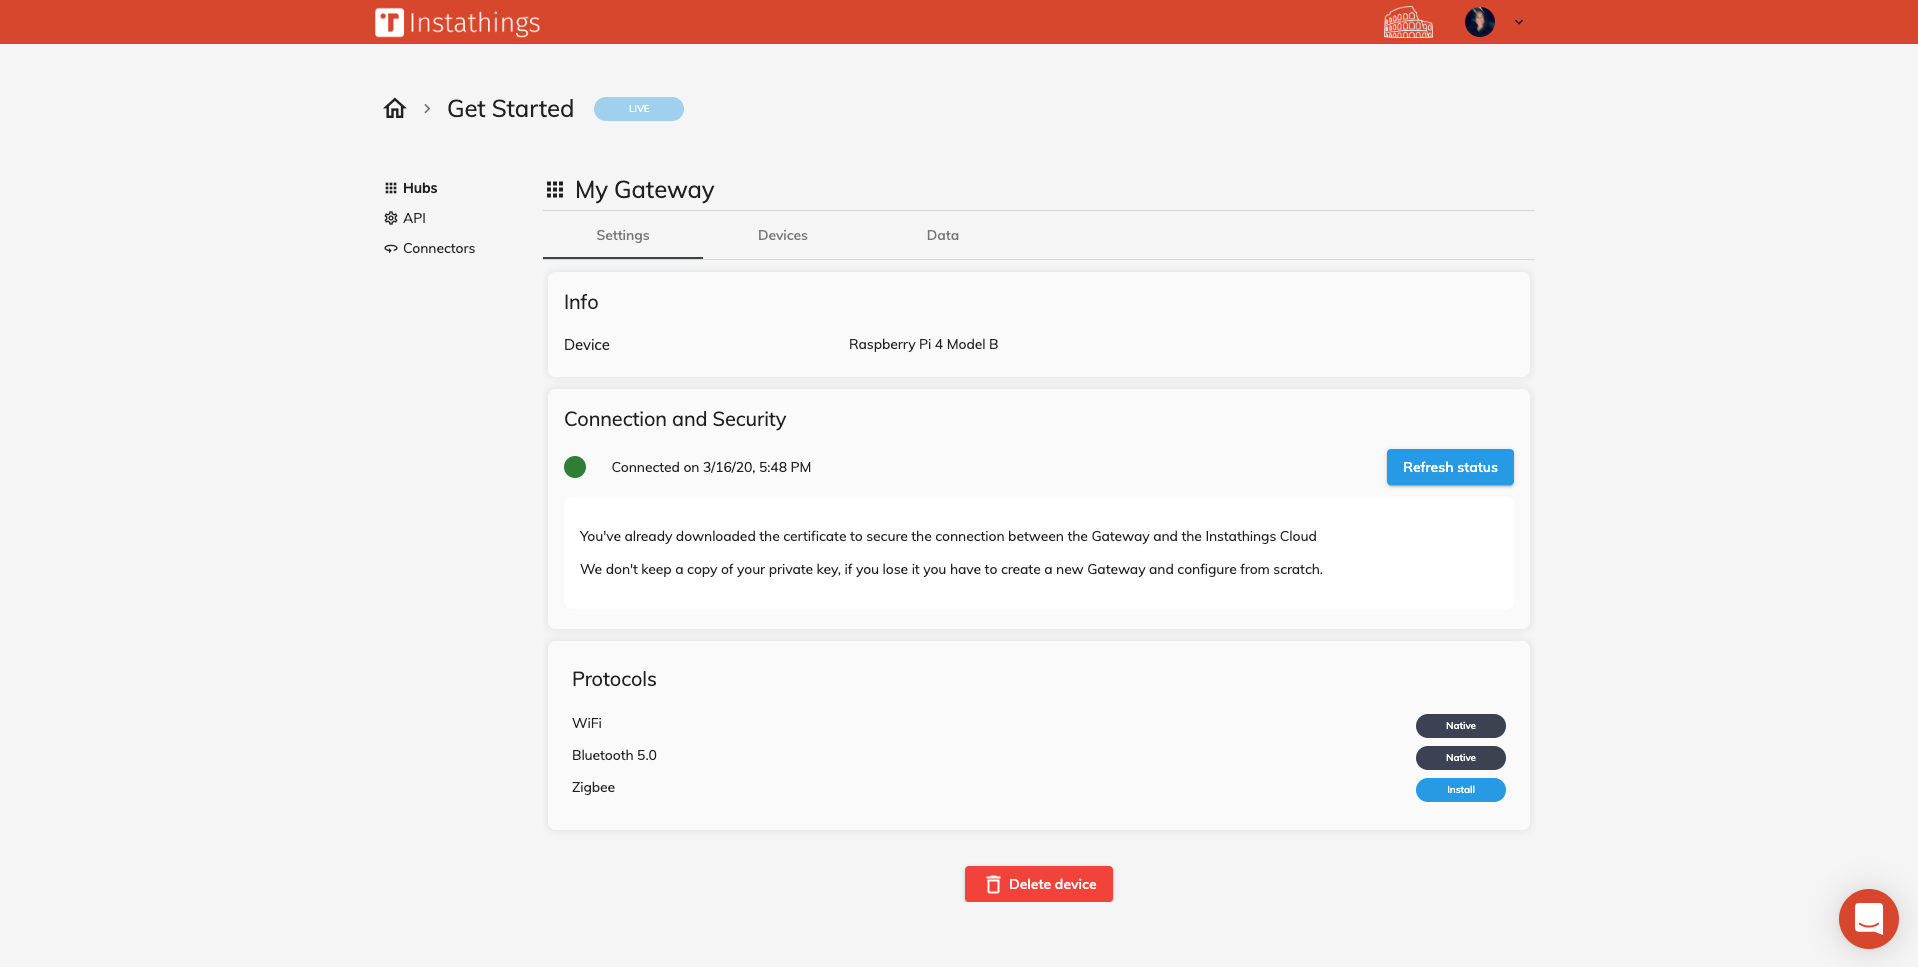
- navigate in your Gateway detail page
- make sure it is powered on and connected by checking the connection status (it should be green).
- click on the
installbutton of the Zigbee protocol installedwill appear as soon as the Gateway completes the installation
Pair a device
Once you have installed the Zigbee protocol, you can now pair your Zigbee device to the Instathings Cloud and stat receiving data!
In the following steps we used a temperature sensor from Xiaomi as example.
Create the subdevice
Go to the Hubs page, select a Gateway and then move to the Devices tab.
Type a name and choose the correct model, in this case we used the model Xiaomi WSDCQ11LM

Pair time!
Once you have created a subdevice you'll get a new row that logically represents your device. Now it's time to pair the device.
Now you have to pair your device to you Gateway by clicking on the Pair button on the right side of the page.
To pair this device we have to keep a button located at the bottom of the device pressed for about 10 seconds until the LED starts to blink.
If you are not using a Xiaomi device, but you want to pair another kind of device, check the Zigbee supported devices page to know how to do the pairing.
