Working with HTTP 🏳️🌈
Instathings supports every device able to receive an HTTP request and reply with application/json content type.
In this tutorial we will show you how to integrate a device that supports HTTP APIs with Instathings.
It will take about 5 minutes, let's get started!
Requirements
Before you start you need a configured Gateway and a smart device which is reachable from the Gateway. If you haven't configured a Gateway yet, you can go back to the previous tutorial and set it up!
How to connect your device to your network varies based on the device, refer to the manufacturer documentation for this.
In this guide we will use a Shelly Plug S.
Pair a device
Once your Gateway is connected, if it has native WiFi protocol, you can start pairing your device.
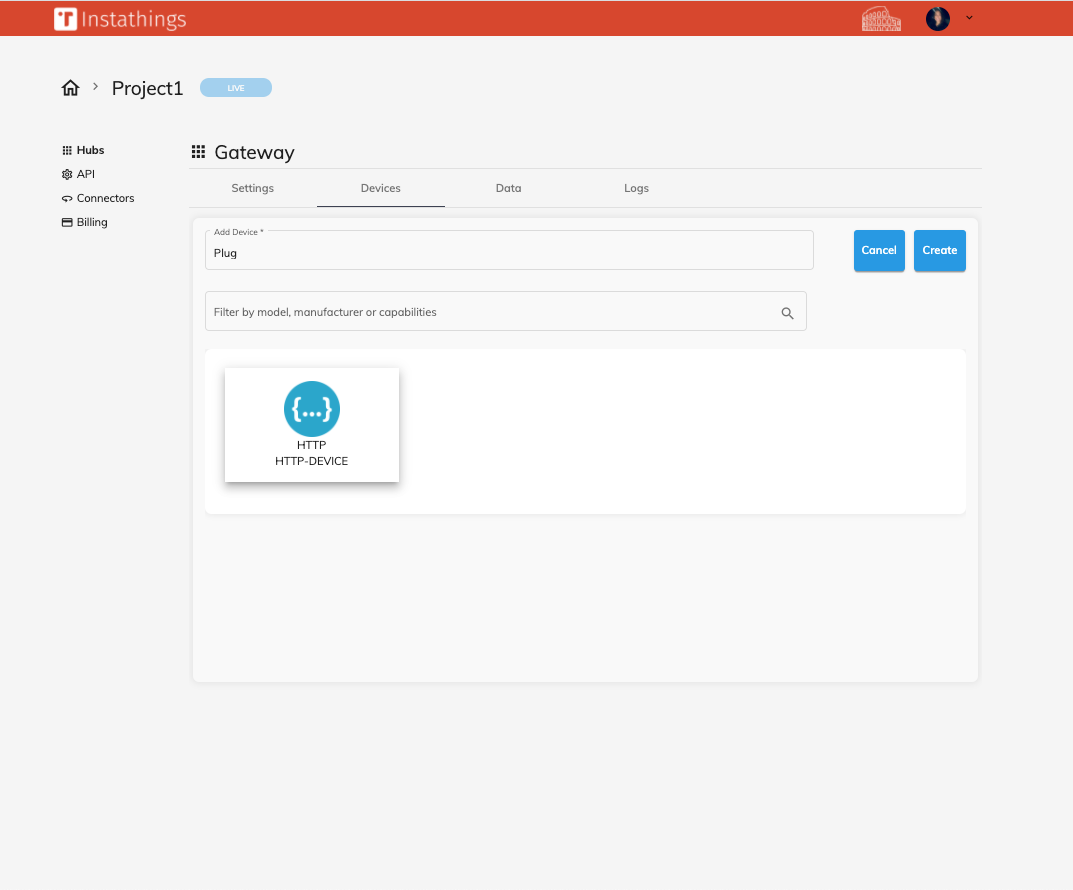
Go to the Hubs page, move to the Devices tab, fill the Add Device form and choose HTTP-DEVICE as model.
Click on create.
Pair time!
To pair your device you have to provide some information about its network configuration:
Protocol: you can choose the connection protocol amonghttpandhttpsHostname: a valid IP address or hostname your device is reachable toPort: the port which your device is listening on

Fill the form, click Pair and in a few seconds you should see the Paired message popping up. Good job!
Instathings API
You can now send HTTP requests to your device via Instathings.
Usually to read/set status of a device through Instathings two steps are needed:
- identify the device endpoint
- call the endpoint via Instathings
Step 1 is usually achieved by referring to the manufacturer provided API reference.
Step 2 will leverage two Instathings API that allows you to read or set the device status.
To cover our case we refer to:
- the Shelly API reference
- the control a device and the get status API endpoints
Get device status
Identify the device endpoint
In order to know the status of a a Shelly Plug S we'll call the device /status endpoint.
Call the endpoint via Instathings
To use the Instathings API to retrieve the device status we'll to call the Get device status by id.
Instathings HTTP request will be a POST the /device/v1/control/:deviceId/ endpoint as follows:
curl -XPOST \
-H 'Authorization: Bearer abc.def.ghi' \
-H "Content-type: application/json" \
-H 'instathings-path: /status' \
-H 'instathings-method: GET' \
'https://yourProjectName.instathings.io/device/v1/control/:yourDeviceId/status'
Note that you need to set the following headers:
instathings-path: in which you have to specify the relative path of your device endpointintathings-method: the HTTP method needed to call your device endpoint
In the response headers you will find a location header whose value is the path you have to call with a GET to retrieve the status of your device
curl -XGET \
-H 'Authorization: Bearer abc.def.ghi' \
-H "Content-type: application/json" \
https://yourProjectName.instathings.io/device/v1/control/:requestId/fetch
Voilà. We retrieved the status of the smart plug.
Change device status
Identify the device endpoint
To turn the plug on/off we need to call the /relay/0 endpoint with the turn query parameter.
Call the endpoint via Instathings
To use the Instathings API to change the device status we'll to call the Control endpoint.
So we have to call the Instathings endpoint /device/v1/control/:deviceId/set to set the status of a device as follows:
curl -XPOST \
-H 'Authorization: Bearer abc.def.ghi' \
-H "Content-type: application/json" \
-H 'instathings-path: /relay/0' \
-H 'instathings-method: GET' \
'https://yourProjectName.instathings.io/device/v1/control/:yourDeviceId/set?turn=on'
You need to set the headers:
instathings-path: in which you have to specify the relative path of your device endpointintathings-method: the http method needed for your device endpoint
And the query parameters (due to the particular Shelly API)
turn
There you go, you just changed the status of the smart plug.