Gateway Setup 🤖
In this section we will show the very first steps to build your IoT Instathings world!
In order to manage all your sensors and devices you will need a Gateway with an Internet connection. You can choose a Raspberry Pi (which we used for this tutorial) or any device that is able to install Docker.
If you have any question about choosing a Gateway feel free to contact us on our site!
Software Requirements
Install Docker 🐳 on your Gateway executing the following commands in the command line one by one.
They are suitable for Linux, if you have other operating systems please refer to Docker documentation.
curl -sSL https://get.docker.com | sh

sudo usermod -aG docker pi
Gateway onboarding
Your Gateway is now ready to be connected to the Instathings Cloud.
Log in to Instathings Editor and start by creating a new project on the Projects page. Give your project a name and choose the live environment. For more information about Sandbox and Live environments refer to the sanbox project documentation section.
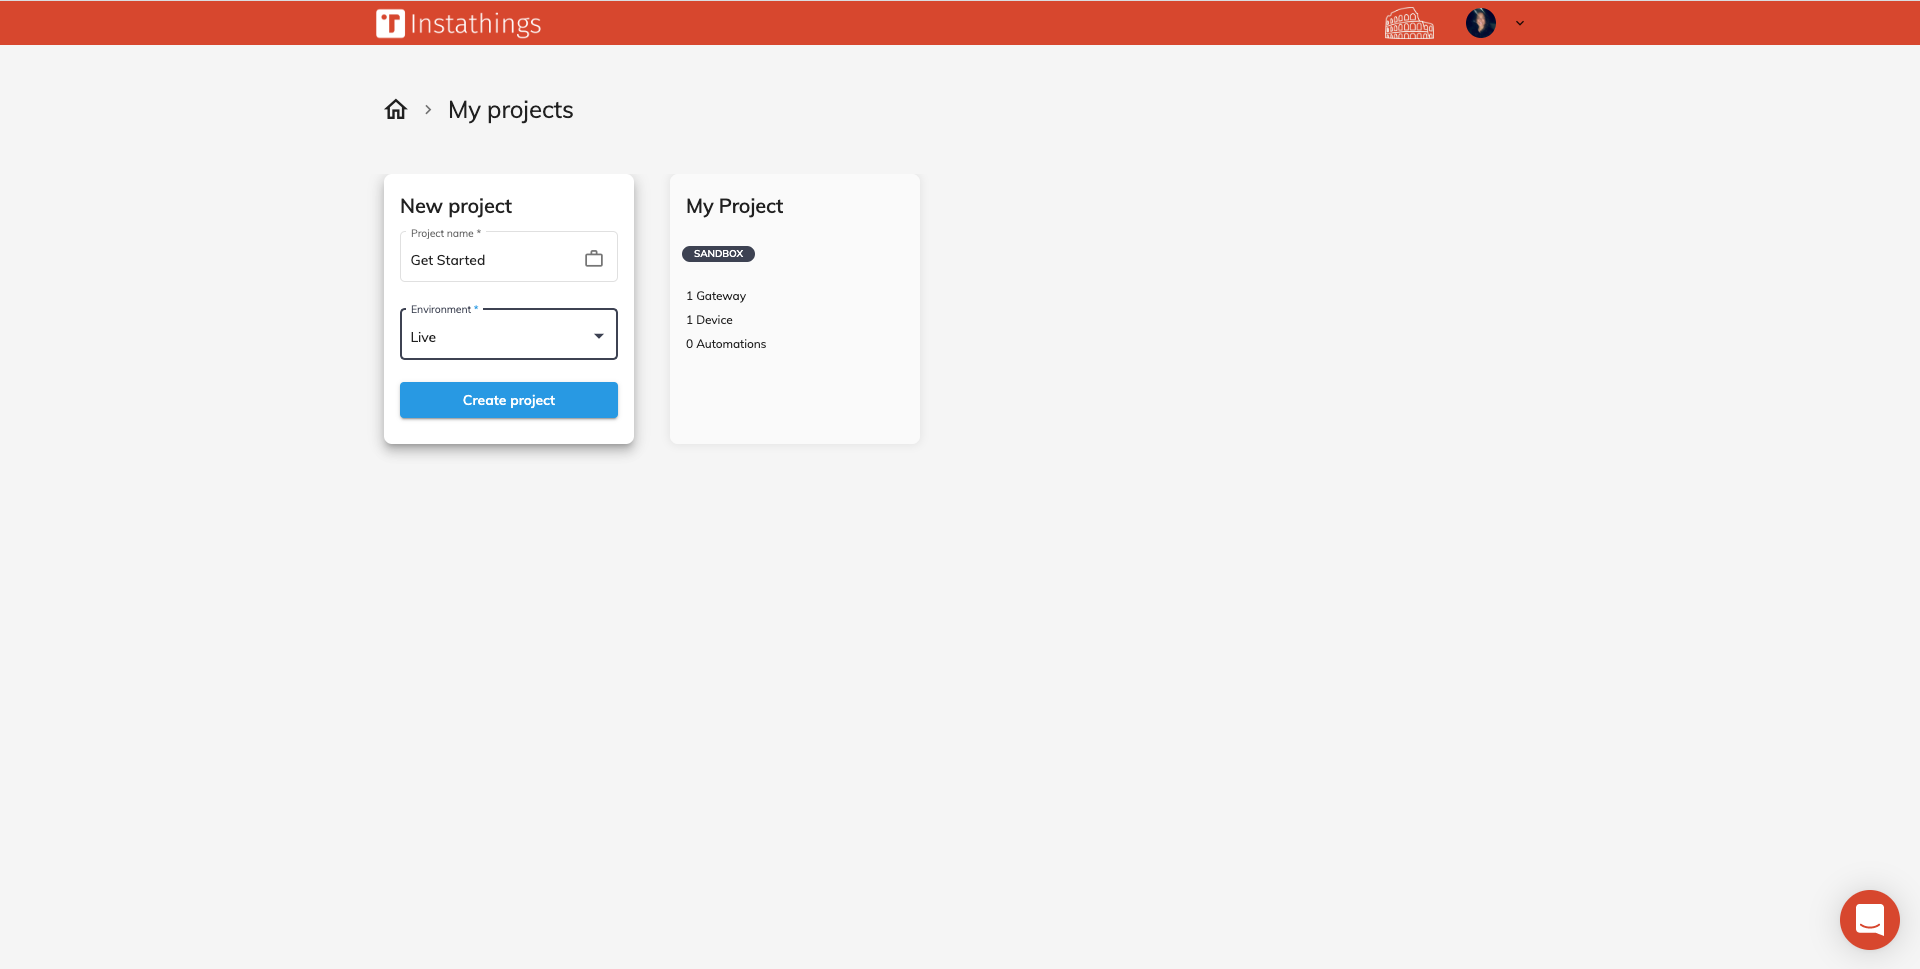
Once you have created you project, you can start by creating you first Gateway. On the top of the page fill the form, choosing the kind of device you are using and a name for your device. Click on Create and you will be redirected to Hubs page. Here you can see all the information related to your device.
You can choose two different ways for connecting you Gateway:
Automated
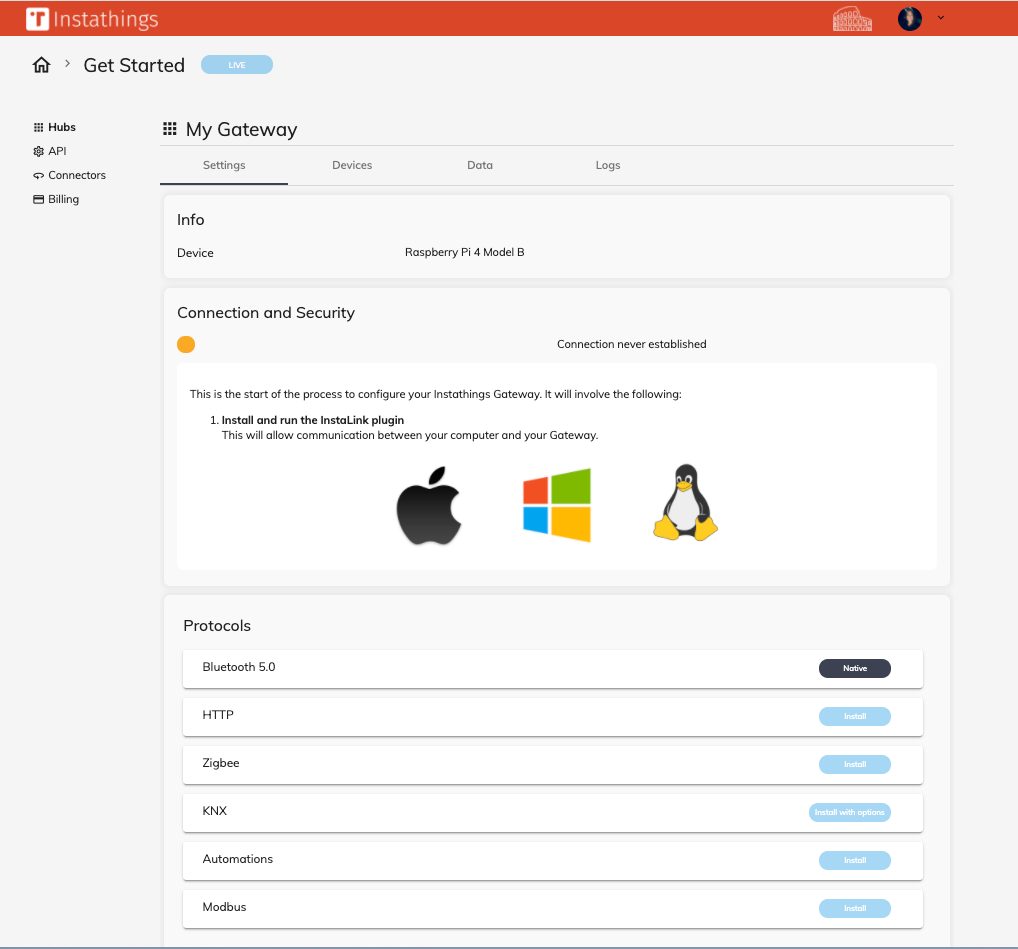
Before connecting the Gateway to the Instathings Cloud, you need to install the InstaLink plugin.
If it is the first time you connect a Gateway, the hubs page should ask you to download the InstaLink plugin. The software is available for MacOsX, Linux and Windows.
Click on your operating system icon and the download will automatically start.
Now it's time to install InstaLink on your computer. When the installation process is completed the Instathings icon should appear in the menu bar (or in the application bar, depending on the operating system you are working with).
You can check the status by clicking on the icon and you shoud see Insta-link ready if everything is working correctly.
By clicking on Open debug console you are redirected on the console where you can check what will be happening on your Gateway when you configure it.
You're almost ready let's move to the next step!
Connect your Gateway
Now you have to insert the following information to allow the InstaLink plugin to connect via SSH to your gateway:
Hostname: hostname or IP address of your deviceUsername: the user that will be used to connect to the GatewayPassword: the SSH password related to that user
Click on Setup Gateway and wait a few seconds for the Gateway to be connected!

DIY
In order to get connected to Instathings and to our Cloud you need generate and download the certificates to secure the connection between the Gateway and the Instathings Cloud.
Click on Show advanced options and the download will automatically begin as you click on Download.
Unzip the folder and move it into the Gateway. To do this we suggest using the command line, but you can do it the way you prefer.
In the terminal type the command scp -r followed by the credentials folder and the IP address of your Gateway.
scp -r device-htBdp3Z9-credentials pi@raspberrypi:~
Now enter in your Gateway via SSH and move into the credendials folder end exectute the install script as follows:
# enter via ssh
ssh pi@raspberry.local

# move into the credentials directory
cd device-htBdp3Z9-credentials

# install script
./install.sh
The script will create the Docker containers you need to interact with your sensors and devices. However you don't need to worry about it, just go back to the Hubs page and check the connection.
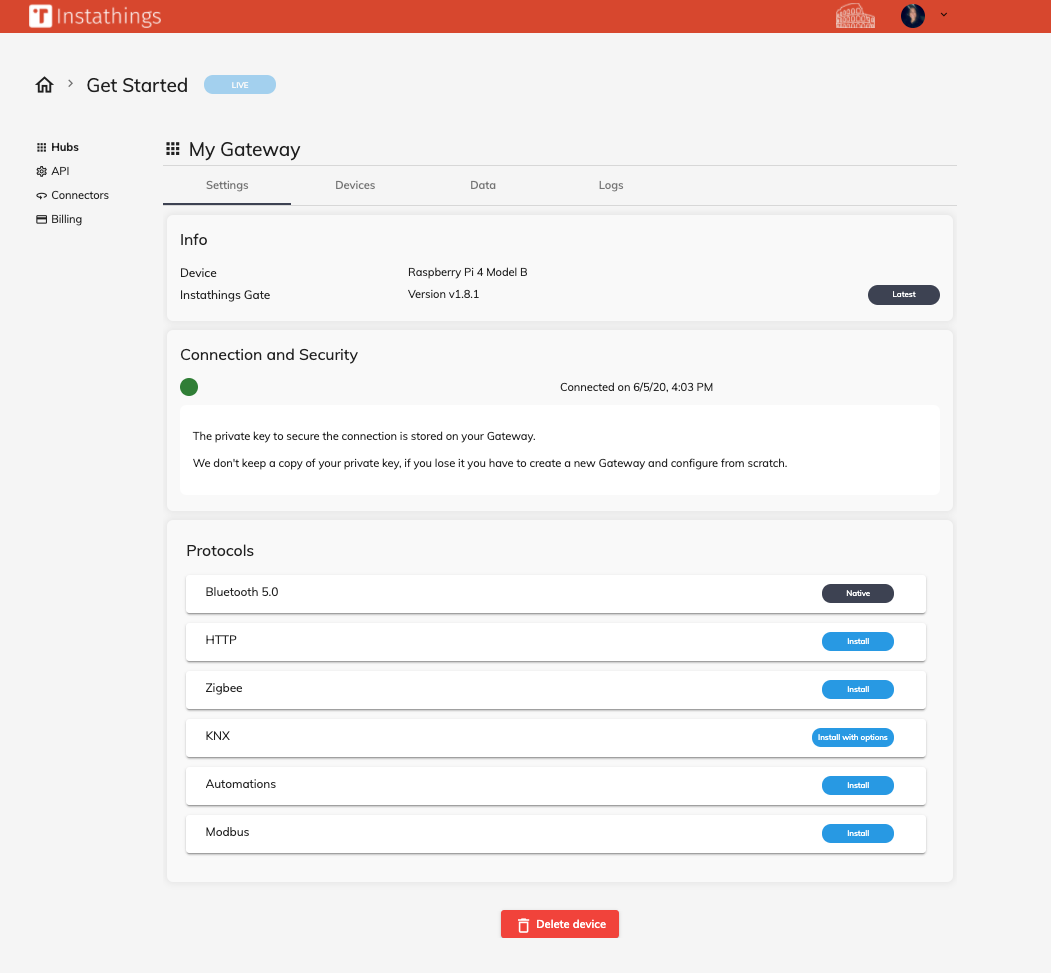
Gateway connected!
No matter which method you have chosen to connect the Gateway, if everything worked fine, you should see the connection status turning into green.
The connection status can be:
- 🟠 Yellow: the connection has been never established
- 🟢 Green: the Gateway is connected
- 🔴 Red: the connection has been lost
And that's it with this tutorial! You can now start adding your subdevices, gather data and control them!
Have fun!